Search This Blog

Showing posts with label ceritifcate. Show all posts

Tuesday, September 8, 2015

Create/Replace Check Point Mobile Access certificate


First generate CSR (Certificate Signing Request), from the security gateway, to sign it on a valid certificate authority - CA, like GoDaddy, Thawte, Versign etc.

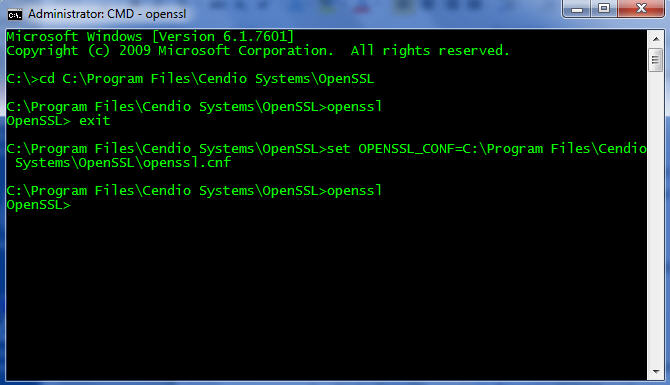
Run this command on the security gateway (that runs also the mobile access):

cpopenssl req -new -newkey rsa:2048 -out CERT.CSR -keyout KEYFILE.KEY -config $CPDIR/conf/openssl.cnf

A run output example:

[Expert@CP-SG1:0]# cpopenssl req -new -newkey rsa:2048 -out CERT.CSR -keyout KEYFILE.KEY -config $CPDIR/conf/openssl.cnf
Generating a 2048 bit RSA private key
.........................................+++
............................................................................................................................................................+++
writing new private key to 'KEYFILE.KEY'
Enter PEM pass phrase:
Verifying - Enter PEM pass phrase:
-----
You are about to be asked to enter information that will be incorporated
into your certificate request.
What you are about to enter is what is called a Distinguished Name or a DN.
There are quite a few fields but you can leave some blank
For some fields there will be a default value,
If you enter '.', the field will be left blank.
-----
Country Name (2 letter code) [AU]:IL
State or Province Name (full name) [Some-State]:TLV
Locality Name (eg, city) []:TLV
Organization Name (eg, company) [Internet Widgits Pty Ltd]:COMPANY
Organizational Unit Name (eg, section) []:IT
Common Name (eg, your name or your server's hostname) []:ssl.company.com
Email Address []:administrator@company.com

Please enter the following 'extra' attributes
to be sent with your certificate request
A challenge password []:
An optional company name []:
[Expert@CP-SG1:0]# ls
CERT.CSR  KEYFILE.KEY
[Expert@CP-SG1:0]#

Note that most of the details (marked in green) are just for formality and proper information in the certificate, most important fields are the common name, which must be the site DNS name and the e-mail, which most CA will send the certificate to (it must be admin@ or adminsitartor@ account).

In the end of the process we will get two files:

CERT.CSR is the certificate signing request that we will send to the CA for signing.

KEYFILE.KEY is the file which holds the private key for the certificate, Save this file in very secure place, also write down the password for this file (in secure place) – we will need it later on.

Now all you have to do is to send CERT.CSR file to the CA for signing and wait for an e-mail (in administrator@company.com mailbox) with the signed certificate.

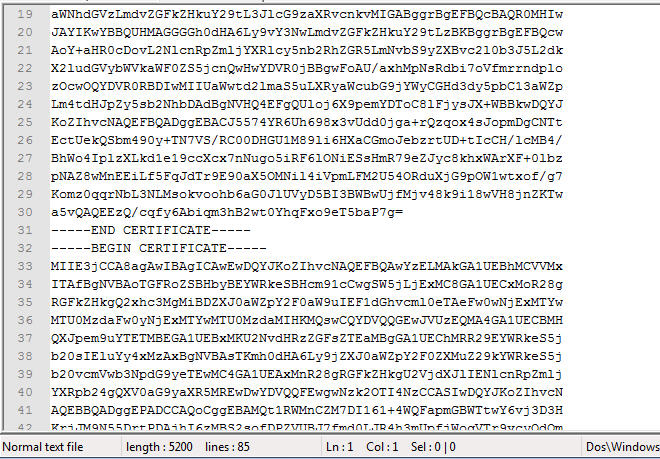
This is PEM certificate example received from the CA:

-----BEGIN CERTIFICHTE-----
MIIEfDCCH9SgHwIBHgIQHPuD9eDiE0VwdreDnFmubjHNBgkqhkiG9w0BHQsFHDBj
MQswCQYDVQQGEwJVUDEVMBMGH8UEChMMdGhhd3RlLCBJbmMuMR0wGwYDVQQLExRE
b98hHW4gVmFsHWRhdGVkIFNTTDEeMBwGH8UEHxMVdGhhd3RlIERWIFNTTCBDQSHt
IEcyMB4XDTE8MDkwNjHwMDHwMFoXDTE3MDkwNTIDNTk8OVowGDEDMBcGH8UEHxQQ
c3NsLmdhbGF0ei5jby5pbDCCHSIwDQYJKoDIhvcNHQEBBQHDggEPHDCCHQoCggEB
HOHsIfVypDyOhvr6yXxuQNmk6Lnf3uvYJv8xYgcfCMYs0EYpQf5o9p8DVcy7oc/W
YJ+gxDTeykDWGvfih/NdrHceyWXtVDDxQDcgfKmHoncHJktmLnQDPCF4EC+k3pkP
x5DnQt/rK6djxMBkRwN7S8PVCDi788OeGpebbqpYX+le9ciOG650SjHV8yf6bYGD
Kk58d88eQYn9cEXEuTef6SyIhNDsU5fPxd9MTDsHdHHRoireQk3swES4UDKD4jVp
Le/Jjw3KfPinJyhsQcJJ9ESWTv/HQ/9igLvPyv7lF883PGUW8qE6qNg5DBfvOwvf
UIhoBVSt9S/fNeuGIhJMmk0CHwEHHHOCHXIwggFuMBsGH8UdEQQUMBKCEHNDbC5n
YWxhdHouY98uHWwwCQYDVR0TBHIwHDHrBgNVHR8EJDHiMCCgHqHchhpodHRwOi8v
dG4uc3ltY9IuY99tL3RuLmNybDBuBgNVHSHEDDBlMGMGBmeBDHECHTBDMCYGCCsG
HQUFBwIBFhpodHRwcDovL3d3dy50HGF3dGUuY99tL9NwcDHvBggrBgEFBQcCHjHj
DCFodHRwcDovL3d3dy50HGF3dGUuY99tL3JlcG9DHXRvcnkwHwYDVR0jBBgwFoHU
n7jBqWDy9cHiKpTtXJms8ODXxgcwDgYDVR0PHQH/BHQDHgWgMB0GH8UdJQQWMBQG
CCsGHQUFBwMBBggrBgEFBQcDHjBXBggrBgEFBQcBHQRLMEkwHwYIKwYBBQUHMHGG
E9h0dHH6Ly90bi5DeW8jDC5jb90wJgYIKwYBBQUHMHKGGmh0dHH6Ly90bi5DeW8j
Yi5jb90vdG4uY3J0MH0GCSqGSIb3DQEBCwUHH4IBHQCxDHU+tDieQ+rKDuFCm3or
cHYRHSe8g/eIqyN+xwy/V+lb4CipYYtwNH/wN9jL9uLjf/BCBjjEPFn9IDeDIBDl
yK99PNjUxlh50Ik0lY+8NBwFwT86YrLi8HKHyStFbXLyNLD8Mf9o8GbueuKcHD57
cjocpYoQPDxK9KKhY8nDDkXv69CMQcvS9DgkTj6HgDDV6vNOFo0e3GvXMlFpfdOE
rNYtvQ8O7E8lvl8v7QS8uTDYd70eTCX7Unk4/ONJOKl9HVGi97q9VTYOKUFNwB7W
uHP+Chqf8ppmDylGebD8cHukfv7+9BijpUDc+PNlb9/5xYsO8RCS3UhMIMd7wmDH
-----END CERTIFICHTE-----

Now we need to convert the PEM to .p12 format, create text file and copy the certificate into it,
Copy the text file (I called it CA_CERTIFICATE.TXT) and both CERT.CSR and KEYFILE.KEY, to the security gateway – here in this example I have created a new directory under /home directory called CERT:
[Expert@CP-SG1:0]# ls -la
total 16
drwxrwx--- 2 admin root 4096 Sep  8 12:54 .
drwx------ 3 admin root 4096 Sep  8 12:54 ..
-rw-rw---- 1 admin root 1054 Sep  8 12:40 CERT.CSR
-rw-rw---- 1 admin root    0 Sep  8 12:54 CA_CERTFICATE.TXT
-rw-rw---- 1 admin root 1743 Sep  8 12:40 KEYFILE.KEY

Now run the following command:

cpopenssl pkcs12 -export -in CA_CERTIFICATE.TXT -inkey KEYFILE.key -certfile CERT.CSR -out SSL_CERTIFICATE.p12

Enter the private key password, and type new export password (which will be required in case of exporting the password).

Now enter the SmartDashboard, double click on the relevant security gateway under network objects, and select Mobile Access -> Portal Settings, click on Replace… key:


Choose the newly created file named: CERTIFICATE.p12

Close this window and install policy.


Monday, May 20, 2013

Cisco WLC Certificate signing


In the following post I will explain and describe the steps needed for create, sign and install a certificate on Cisco WLC controller for web authentication portal.

In general the process goes like this:
     1.       You create a CSR and send it to a 3rd party CA for signing
     2.       The CA returns two certificates: device and server
     3.       You use a private key along with the CA certificates to create the final certificate
     4.       Install the certificate on the controller

CSR (Certificate Signing Request) - A CSR is a message that an applicant sends to a CA in order to apply for a digital identity certificate. For the most part, a third-party CA company, like Entrust or VeriSign, requires a CSR before the company can create a digital certificate.

CA (Certificate Authority) – Server/company which responsible for validate and assign certificates, few main CA are: GoDaddy, RapidSSL, Verisign etc.

At first we will need to download and install OpenSSL program version 0.9.6a, and if you are working on Microsoft Windows you will need OpenSSL for windows which can be download from the following URL:
After downloading the file, unzip it and run the setup.exe file, follow the instructions and after the installation process ends reboot the computer.

Now let’s begin; first step is to create a CSR:
1.       Open CMD with administrative privilege (Start->Run, type CMD and press CTRL+SHIFT+ENTER)

2.       Go to OpenSSL working directory (C:\>cd C:\Program Files\Cendio   Systems\OpenSSL)

3.       Type:
set OPENSSL_CONF=C:\Program Files\Cendio Systems\OpenSSL\openssl.cnf, and click enter

4.       Type: openssl.exe and click enter


5.  Type: req –new –newkey rsa:2048 –nodes –keyout mykey.pem –out myreq.pem

6.       A configuration form will appear and you will have to type some information, the most important one is the CN (Common Name) which must be the same as the controller host name and can be retrieved from the controller by entering Controller->Interfaces->DNS Host Name


Process output example:

OpenSSL> req –new –newkey rsa:2048 –nodes –keyout mykey.pem –out myreq.pem
Using configuration from C:\Program Files\Cendio Systems\OpenSSL\openssl.cnf
Loading 'screen' into random state - done
Generating a 2048 bit RSA private key
...........................................+++
.............................................................+++
writing new private key to 'mykey.pem'
-----
You are about to be asked to enter information that will be incorporated
into your certificate request.
What you are about to enter is what is called a Distinguished Name or a DN.
There are quite a few fields but you can leave some blank
For some fields there will be a default value,
If you enter '.', the field will be left blank.
-----
Country Name (2 letter code) [AU]:IL
State or Province Name (full name) [Some-State]:IL
Locality Name (eg, city) []:TLV
Organization Name (eg, company) [Internet Widgits Pty Ltd]:COMPANY.COM
Organizational Unit Name (eg, section) []:IT_WiFi
Common Name (eg, YOUR name) []:wifi.company.com
Email Address []:

Please enter the following 'extra' attributes
to be sent with your certificate request
A challenge password []:123456
An optional company name []:
OpenSSL>

One more important thing is to remember the challenge password as we will need it later in the process.

7.       At the end of the process we will find 2 new files in the OpenSSL working directory: mykey.pem and myreq.pem. Keep the file mykey.pem in safe place along with the challenge password and send the file myreq.pem to the CA for signing.

8.       After the CA will sign your request he will send you back two files – root certificate and device certificate, now we will need to join these two into one file. Open with your favorite text editor the device certificate and copy its content to a new text file, then open the root certificate and copy its content to the new file right below the device certificate content.


     Paste certificates together in order to create one all-in-one

9.       Save the new file as all_certs.pem

10.   Copy the file all_certs.pem to OpenSSL working directory

11.   Type: pkcs12 -export -in all_certs.pem -inkey mykey.pem -out all_certs.p12 -clcerts -passin pass:123456 -passout pass:123456

*the password is the one that we enter in step 6

OpenSSL> pkcs12 -export -in all_certs.pem -inkey mykey.pem -out all_certs.p12 -c
lcerts -passin pass:123456 -passout pass:123456
Loading 'screen' into random state - done

12.   Type: pkcs12 -in all_certs.p12 -out final-cert.pem -passin pass:123456 -passout pass:123456

OpenSSL> pkcs12 -in all_certs.p12 -out final-cert.pem -passin pass:123456 -passo
ut pass:123456
MAC verified OK

13.   Now we have the file final-cert.pem, this is the file that we will install in the controller. Put the file on computer which runs TFTP server and make sure that the controller has access to this computer (most of the problems can be found in this stage where firewalls, NAT and all kind of IP address issues prevent from the controller to access properly to the TFTP server)

From here there are two ways to download the certificate to the controller: web GUI or CLI, I prefer the CLI because it gives you an error output in case there is something wrong but I will show both ways.  
    
14.   Web GUI: enter the controller web GUI and go to Security (1) -> Web Auth (2) -> Certificate and check the Download SSL Certificate checkbox (3)


15.   Type in the required information such the server IP, file name and password (from step 6), in the end click on Apply (in the upper right corner).

     
16.   After the controller will finish download the certificate he will redirect you to reboot system page to save the configuration and reload the controller for the certificate to take effect.
     
17.   CLI: login into the controller using SSH

18.   Type the following commands with the corresponding information:

transfer download mode tftp
transfer download datatype webauthcert
transfer download serverip <TFTP_SERVER_IP_ADDRESS>
transfer download path \
transfer download filename <FILE_NAME>
transfer download certpassword <PASSWORD>

19.   Type: transfer download start to start download and install the certificate

(Cisco Controller) >transfer download start

Mode............................................. TFTP 
Data Type........................................ Site Cert    
TFTP Server IP................................... 172.16.0.80
TFTP Packet Timeout.............................. 6
TFTP Max Retries................................. 10
TFTP Path........................................ /
TFTP Filename.................................... final-cert.pem

This may take some time.
Are you sure you want to start? (y/N) y

TFTP Webauth cert transfer starting.

TFTP receive complete... Installing Certificate.

Certificate installed.
                        Reboot the switch to use new certificate.

In the end reboot the switch by issuing the command reset system.

In order to verify go to Security->Web Auth->Certigficate on the controller web GUI and see the certificate details as validation dates and type.